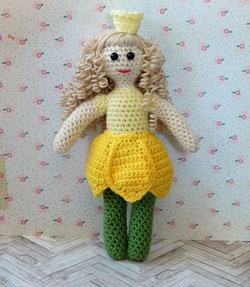
 Occasionally, I like to take some time to make something enjoyable for myself. Really let the creativity flow into something that I find enchanting. My recent creation was an inspiration by the poem Sweet Daffadowndilly written by Christina Rosetti. As a lover of spring I set out to recreate 'Lady Daffadowndilly,' mentioned in the poem, in doll form. Her creation was completely freestyle, but I do hope to have a pattern for her soon. For now, I'll offer to you how I made her hair. It took me a while to decide what type of hair that would embody her. She is the essence of spring. Wild, magical, yet regal with her trumpet crown. Curly seem only befitting of such a beautiful character with untamed curls billowing around her head. Before you start with the curls you will need to make a base for the hair to be stitched onto. In the same color as the doll's hair, crochet a small cap that will be the general outline for the hair. You will then need to stitch in some bangs with the beginning of a part line. This will be your guide on where to attach the curls. Here's what you'll need to make a curly mop for your own doll: Yarn, in the color and weight to you choose (I used worsted) *be sure your yarn won't melt under high heat* Hair Dryer Tinfoil Chopstick or Paper Straw Scissors Tapestry Needle Fabric glue or Hot Glue 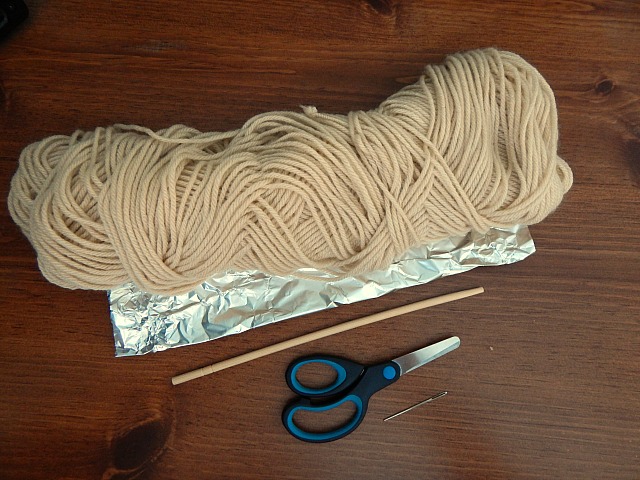 Step 1: Loosely tie the yarn to one end of the stick or straw and then wrap it around. I would gently twirl the stick, guiding the yarn with my finger, and then scrunch it up to get more on the stick. 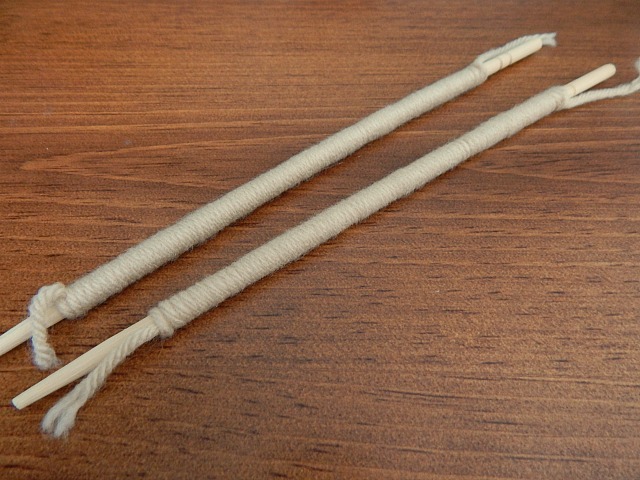 Step 2: Place the prepared sticks or straws in the tinfoil. Fold the tinfoil up to make a little basket shape. Now you will need to heat the yarn wrapped sticks or straws with the hair dryer. I would do this for a couple minutes just to make sure they warmed up enough. The tinfoil is used to evenly heat the yarn on the stick and create a higher heat. 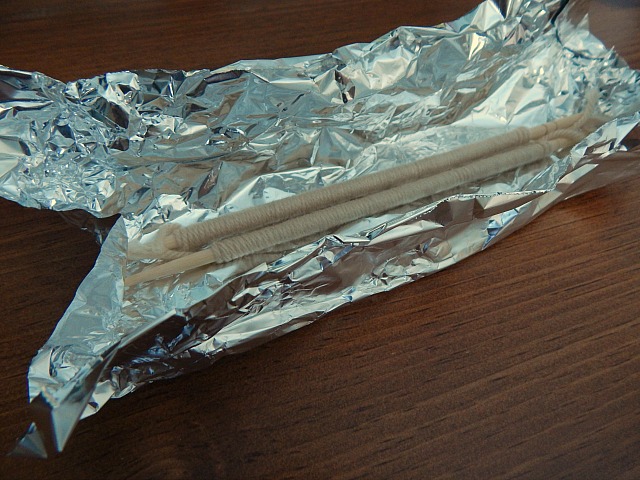 Step 3: Take the yarn wrapped sticks or straws out of the tinfoil and let cool. This will take several minutes. Once cool, gently push the yarn off the stick or straw. The result will look like the picture below. 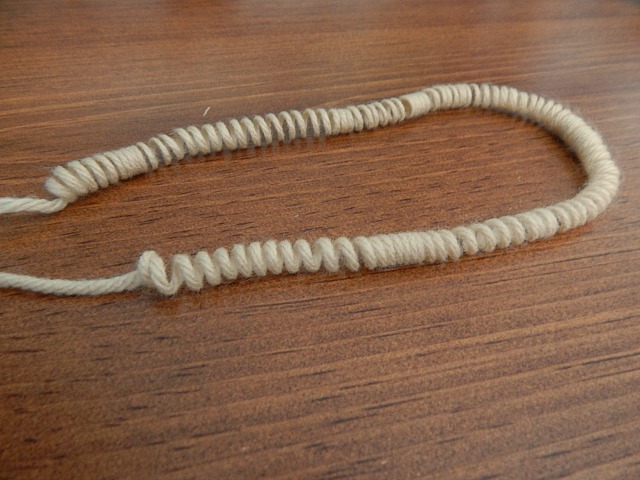 Step 4: Cut the curly yarn into long and short lengths. Start at the front, picking up at where the bangs end on the head. Attach the doll's hair by holding several curl lengths together and back stitch them in place where the part line is to be. Or in other words, you are stitching a loop around the bunch of curly threads to keep it in place. Continue attaching the rest of the hair. 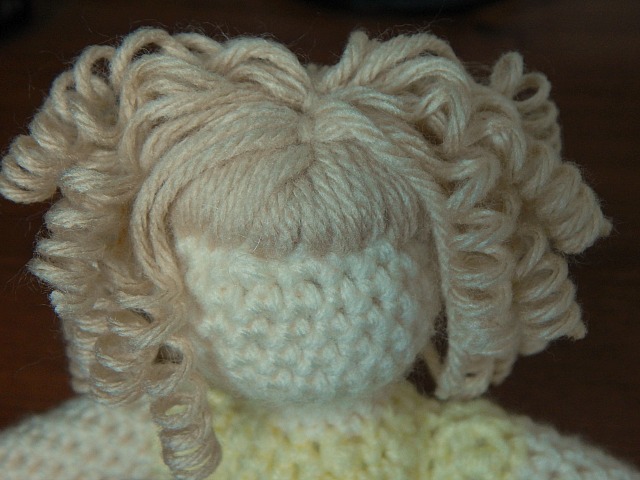 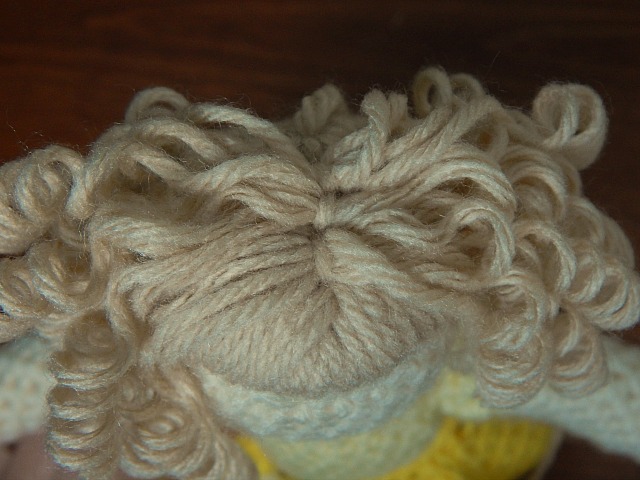 Step 5: The final step is the keep the hair in place and hide as much of the cap as possible. You will need to glue the strands down on the cap. I layered my doll's hair by putting the longer strands underneath and then topping them off with shorter ones. You may also consider doing the doll's hair all one length and gluing it onto the head in the same spot all the way around. 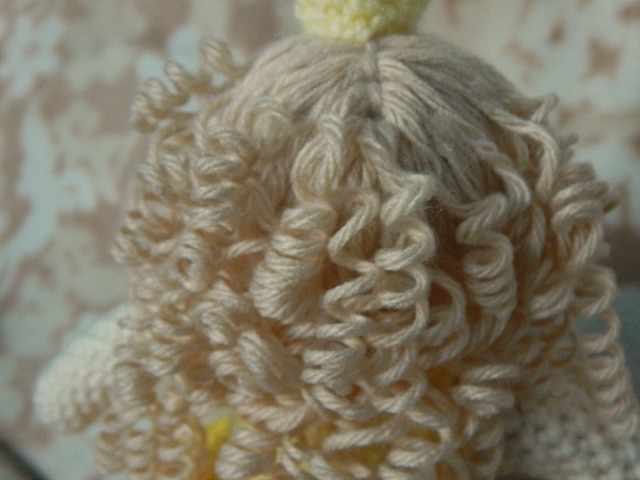
4 Comments
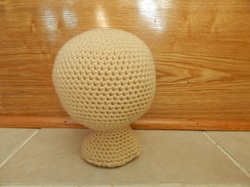 Hey All! I'm popping by today to share something fun I whipped up the other day. It'll really help with photographs and listing items in the shop. If you follow the goings on in the shop, you'll notice that a majority of my listed products are shoes or hand warmers. Both are fairly easy to photograph by themselves, or with the hand warmers, slip on the hand for an idea of what it would look like worn. What I don't have listed are my headbands and hats! I don't feel that laying them flat worked well, I hate the look of styrofoam head forms, and of course I don't have any children myself at the moment! Nor do I have any near by that I can borrow. I followed Erica's pattern from her blog Five Little Monsters. The one I whipped up was the 3-6 month form, but I find that it does alright with setting 1-2 year hats on as well. I made sure to stuff the top head well so that it nicely keeps its shape. The neck part lifts the head portion off the surface to have a better look at the product being displayed. I LOVED how it turned out. Simple and does the job. With that done, keep your eyes peeled for a few headbands to pop up in the shop! Here's a little preview of my Brown Eyed Susan headband. 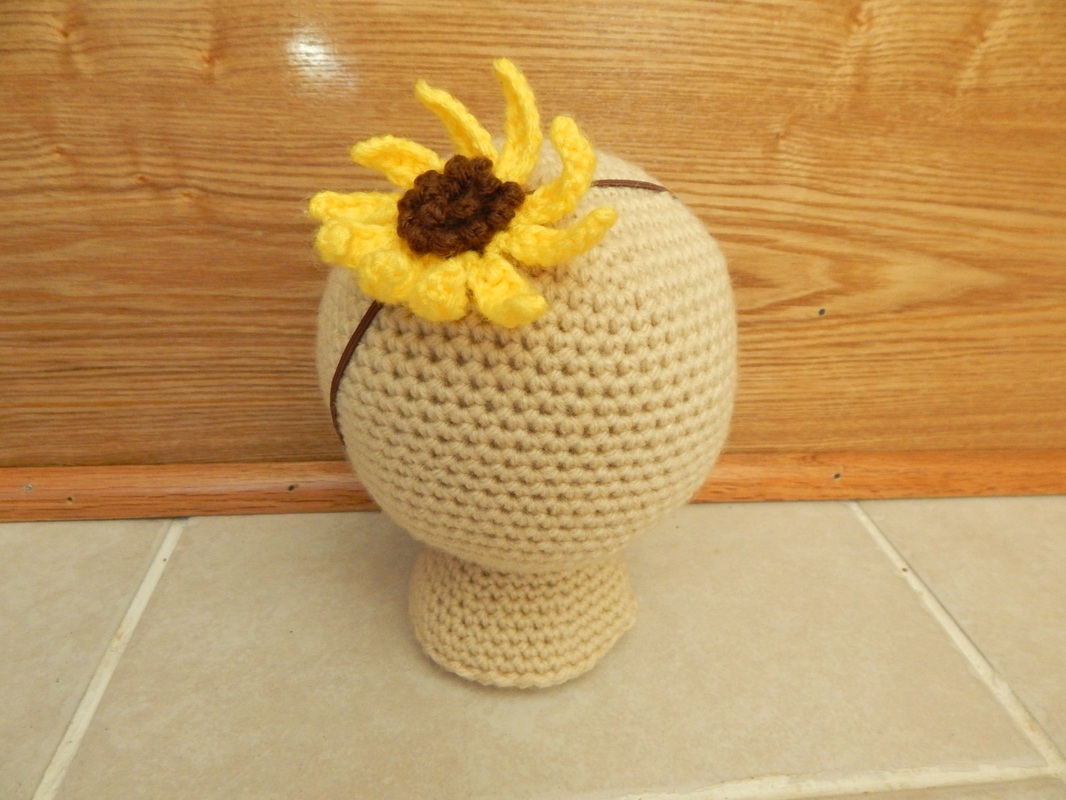 It's been a long time coming, but Miss Niss Craftworks is in for a change. I'm sure you've already noticed. Since the conception of my little business there has always been a little confusion with sharing it with others. Sure, they get what I make. The problem is that the name didn't quite make sense. What I'm talking about is 'craftworks.' Yeah, I made the word up. I thought it'd be kitchy and cute. Boy, was I ever wrong. Many a time I'd say the business name to people, they'd get a glazed over look, and simply respond, 'Ok.' Didn't make me feel that great. In addition, 'craftworks' was a bit of a tongue twister. So, here I am at the brink of a new chapter. At the beginning of this week I have officially given the business its new name! Miss Niss Designs I'll still be offering the same great products. It's just this way the name will make more sense to the consumer and portray my hand in product design a bit better. I have hope that this will offer a brighter future to the Miss Niss brand!
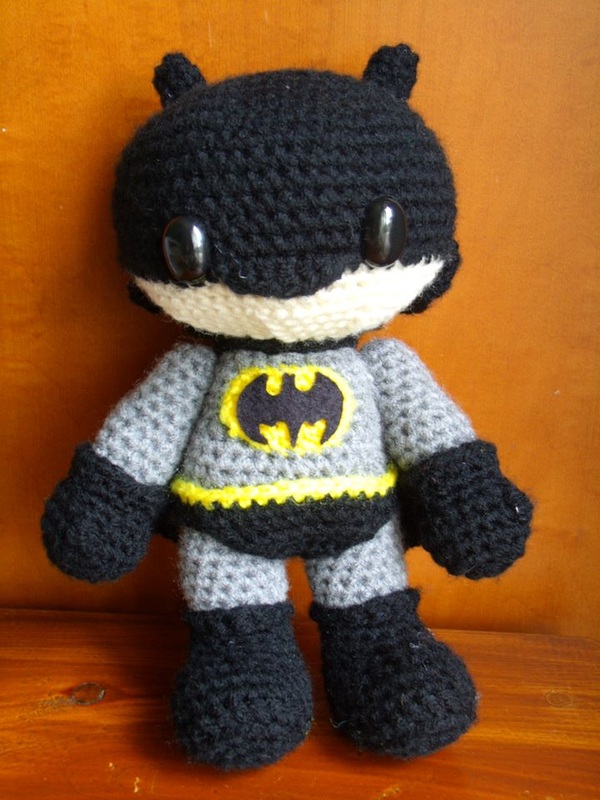
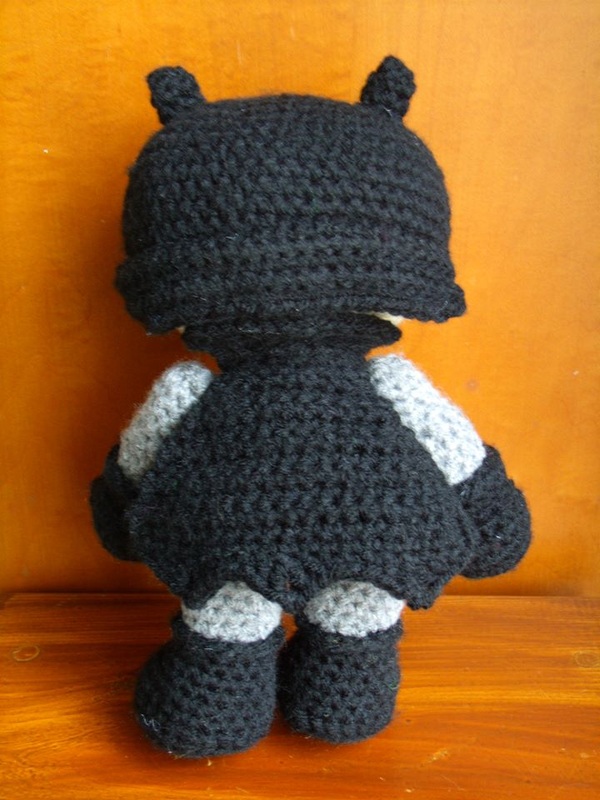
Last Fall I was asked to make a Batman amigurumi for my cousin Maggie. Her brother had ordered it and I was all too happy to whip one up for her. The Batman he wanted was a pattern by Serah over at her Tales of Twisted Fibers blog. The pattern is completely free and pretty easy to make as well! I did however, have to put my own spin on him. I mean, what's Batman without his cape?! So I designed a sweet bat like cape for him to wear on his man bad guy fighting adventures.
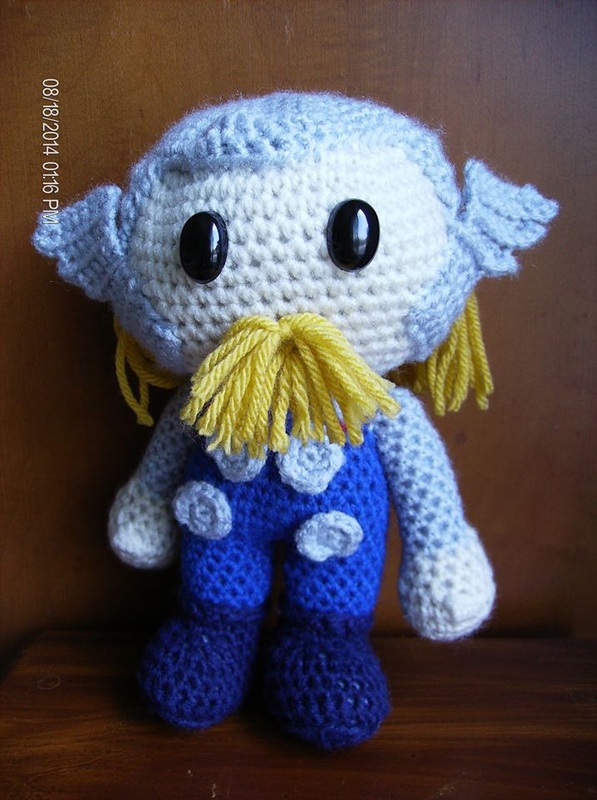
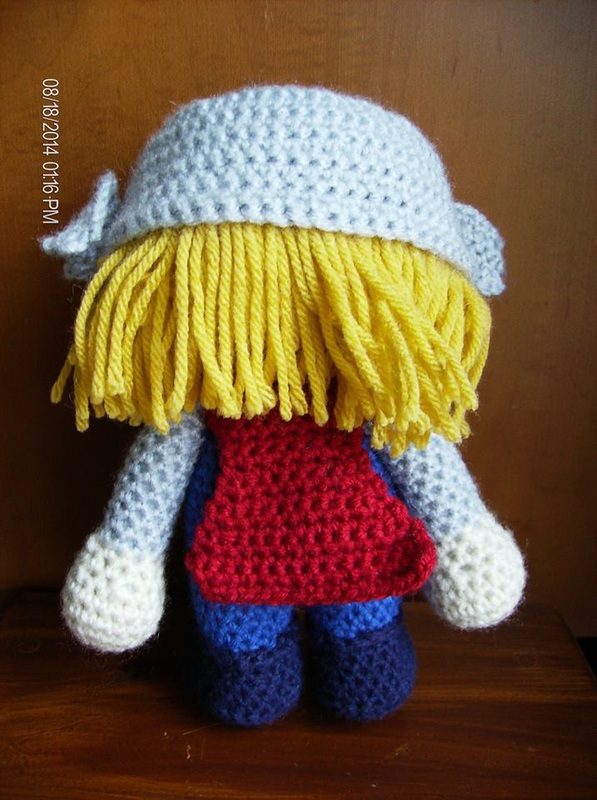
Once I finished I got to thinking that it would be fun to do up a few more Super Heroes that were based on the original pattern. That way they would all have the same sort of look! The next Hero I made was The Hulk. Mean, green, and awesome! He was pretty simple. The differences were figuring out the hair and crocheting him a pair of purple pants. He looks rather tough, right? I guess without the purple pants he'd look more like an angry Jolly Green Giant, haha. 'You eat those beans!' ...yup. 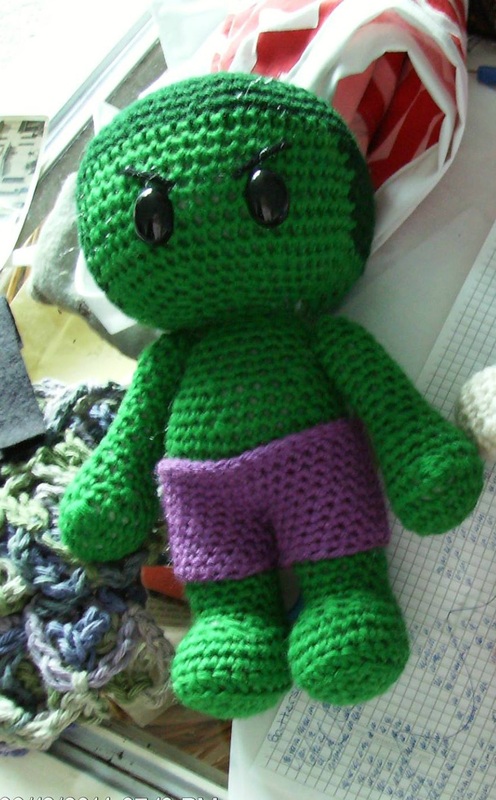 Next, decided to try my hand at Superman. He seemed simple enough. I already knew how to do the hair, make a cape.... Okay, I did struggle. I spent a couple hours staring at him wondering how in the world I'd do the little curly bang on his forehead. I ended up centering a crocheted slip stitch swirl to get the right effect. For the crest I crocheted a triangle in yellow, trimmed it with red, and used a slip stitch to make the 'S'. 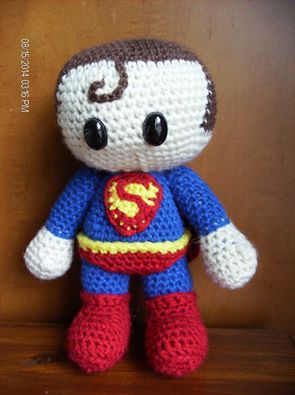 Okay, and of course I had to try my hand at Thor. I'll be honest, I had no clue what I was doing. His general layout was pretty straight forward. I eventually figured out the wings on his helmet. But his facial hair. May not have hit it on the dot. :p Give him a pointy hat he may turn into a gnome! Haha, but for the most part I think he's pretty stellar.
Finally, I ended my Super Hero journey with Captain America. Iconic Classic. The hardest part about him was that darn mask! It was touch and go as I figured out how to properly shape it, providing ample room for eyes and a nose cover. In the end I think I nailed it! 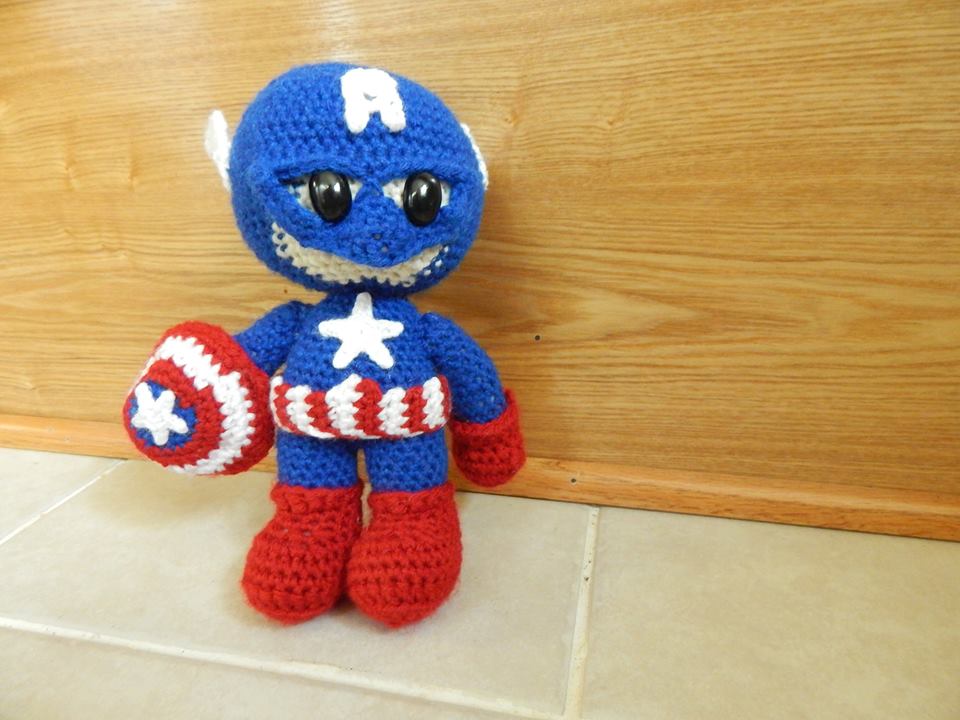 There you have it, 5 totally awesome Super Heroes. Handmade in yarn form. I may or may not try some others in the future. We'll see. For now onto my regular day to day work of booties and all other things cute and practical!
#superheroes #captainamerica #batman #thehulk #thor #superman I had a very busy holiday season. Sales are always increased during the holidays as shoppers look for the perfect gift for their loved ones and friends. As part of my projects I was able to design and knit a few stockings. It was new to me which meant I learned a lot, good and bad. One of my favorite things is to have design freedom when doing a custom order. One of my husband's co-workers asked to have a set of stockings done for his daughters. I was all too happy to say yes especially since the colors requested were pink and purple! 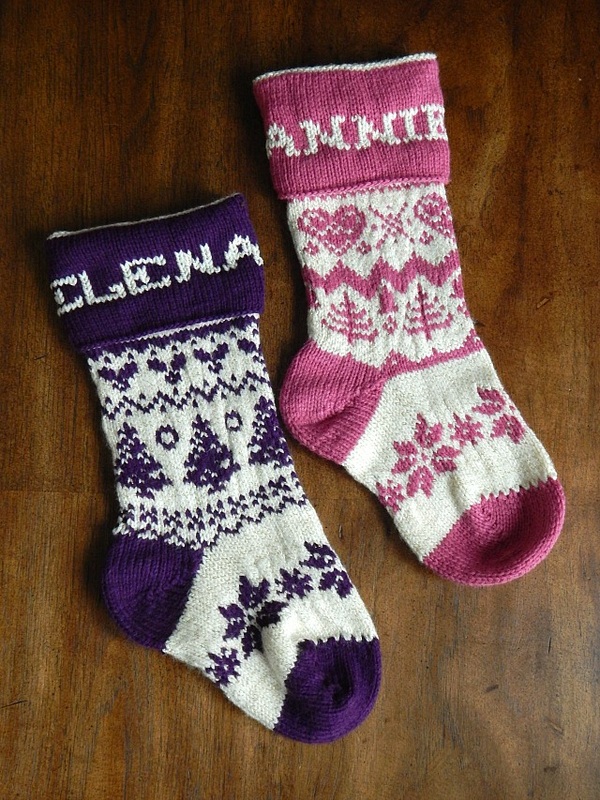 Next, I had the momentous feat of knitting 7 stockings to look like a set that the buyer's Grandmother had knit long ago. So, this required some research on patterns and the style of the stockings. In the end all the stockings were knit, but unfortunately mine were smaller than the originals. I had done my best to meet the measurements, but apparently the pattern I had found was a bit smaller or her Grandmother hand simply knit the stocking bigger/used a larger needle. I felt horrible for the mistake, but out of a Christmas miracle the children loved their stockings anyways -- commenting on the fact that it was neat that they were smaller than Mom and Dad's. So, once again I met a learning curve. I didn't quite conquer it, but know how to change in the future. 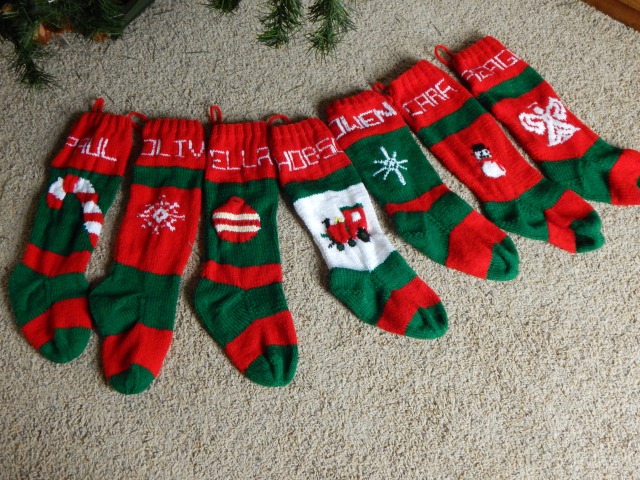 Nevertheless, I knit on. 2014 was a wonderful year for learning. I'm hoping for more opportunities in the New Year with lots of fun and happy memories.
Save some money this weekend and support small businesses! MissNissCraftworks is offering free shipping Today - December 1. #shopsmall 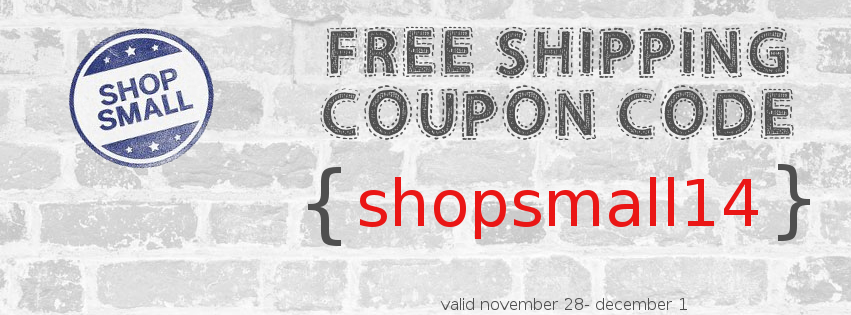
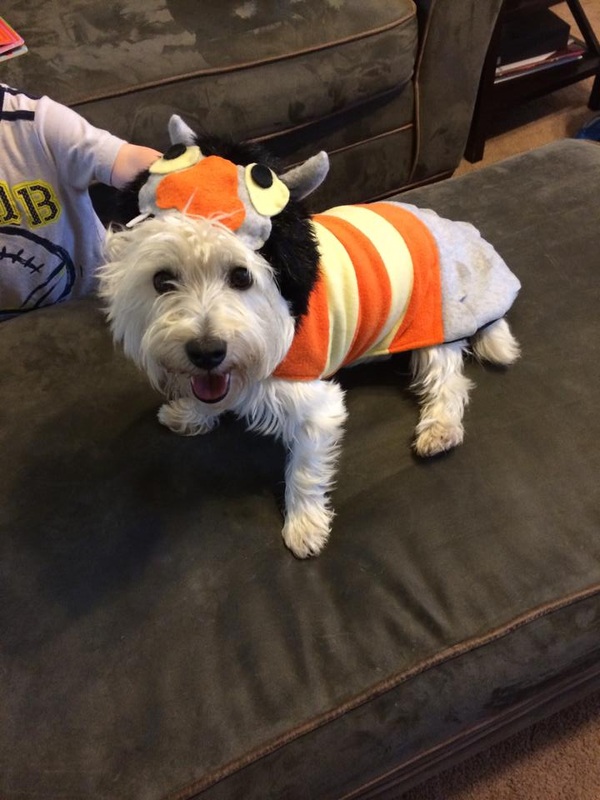
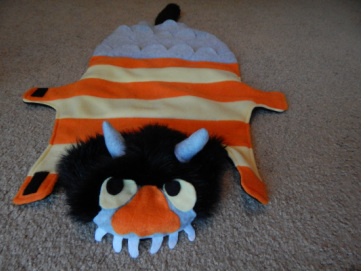 Over a month ago I had a person request a custom order for a dog costume which would be one of monsters from the story 'Where the Wild Things Are' by Maurice Sendak. The idea is that her son would dress as the little boy and the dog as a monster. Cute, right?! Well, her idea came from someone else's sewn work who no longer sells the item or pattern from what I had found at the time. So, my job was to figure out my own pattern to fashion after the original. The whole process was a bit intimidating. I had never sewn with fur before, and without the dog as a form I had to do some research on how to sew a dog 'coat' or rather 'costume.' I am lucky, however, my Mother instructed me one how to work with fur and basic patterns and information was out on the internet to guide me. In the end, my finished product ended up being a little different than the original, but I still think it looks magnificent! I hope the pup looks fantastic in it and most importantly that the little boy who gets to dress up with his dog has a wonderful Halloween! *UPDATE* I no longer sew items for my shop. I'm sorry for those who were looking for a custom of this dog costume. 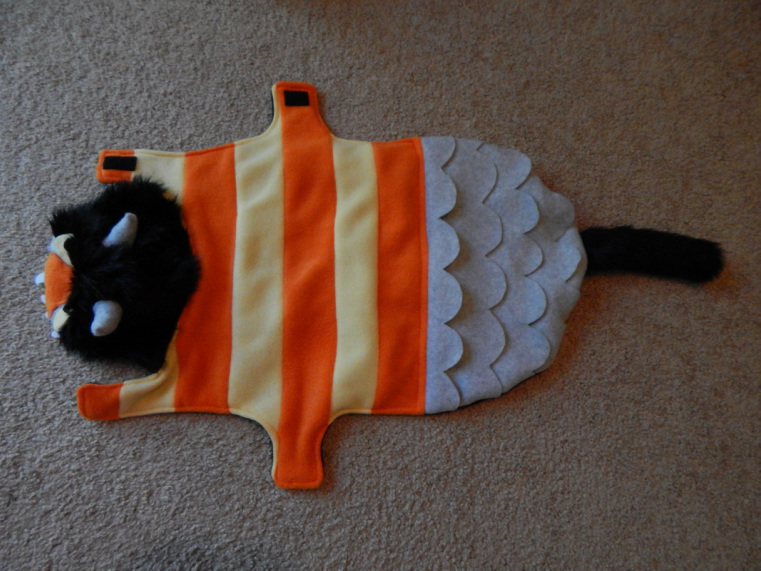 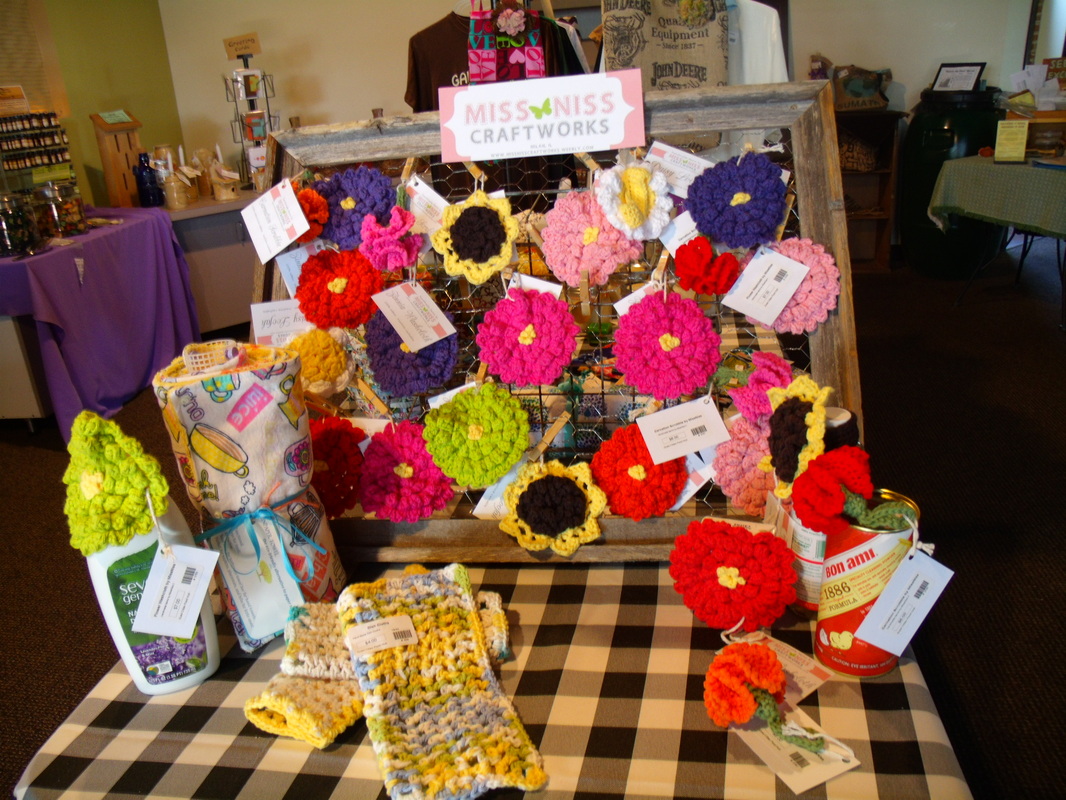
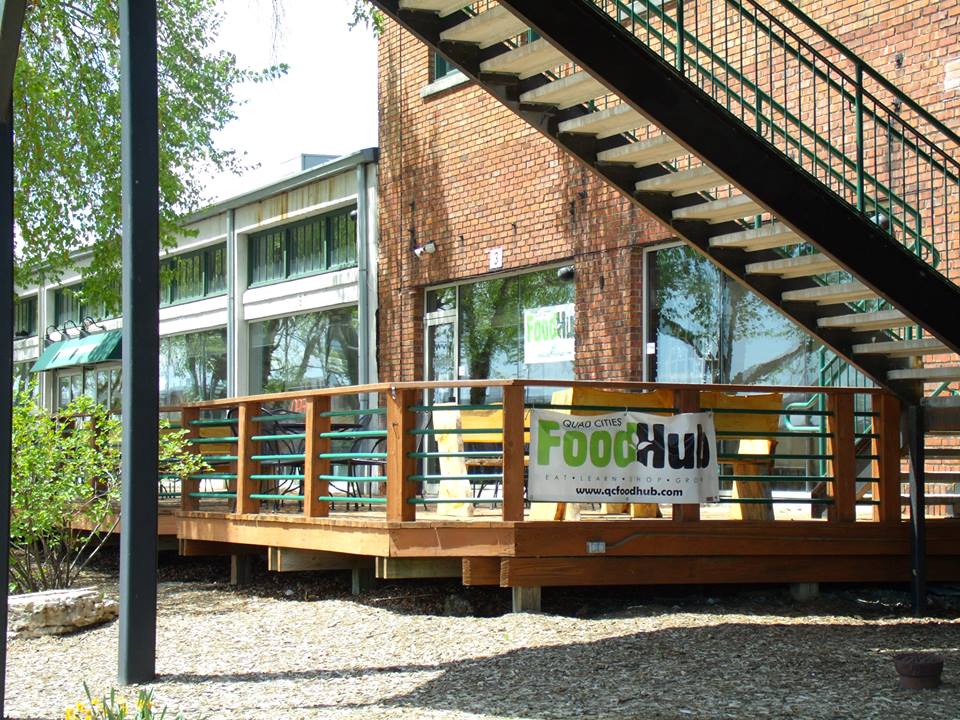
I FINALLY remembered to take my camera with me on a visit to my newest business venture with MissNissCraftworks! As you can guess by the title, I have stepped into the brick and mortar world of selling goods. The more I grow and learn as an artist and seller the more I realize that connecting to my local community is necessary for success. It may have its trials, but in the end my customers know who I am and what I'm all about. The place I chose to begin my journey is the Quad Cities Food Hub which is located in the Freighthouse on the river in downtown Davenport, IA. The reason? I have a strong connection to their mission statement: "To support local food production, connecting producers and consumers; cultivate education and training programs; preserve and expand sustainable agriculture; foster local economic development; and promote healthy lifestyles through use of local foods, including underserved individuals and communities."
While I do not sell food at the food hub, homesteading with these values is another part of my life. I feel the match was a perfect fit in mindset and product. I'm beginning with selling my garden inspired flower bathroom and kitchen goods. The Food Hub is more than just food, local goods like mine are supported there as well. 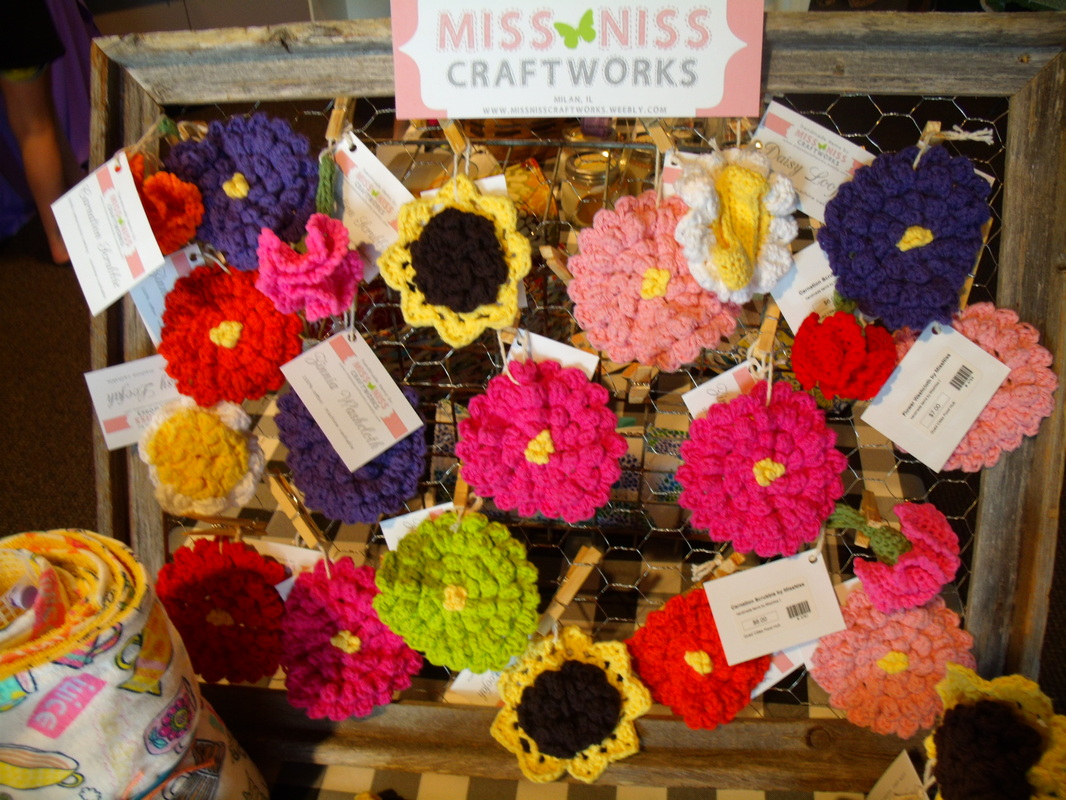
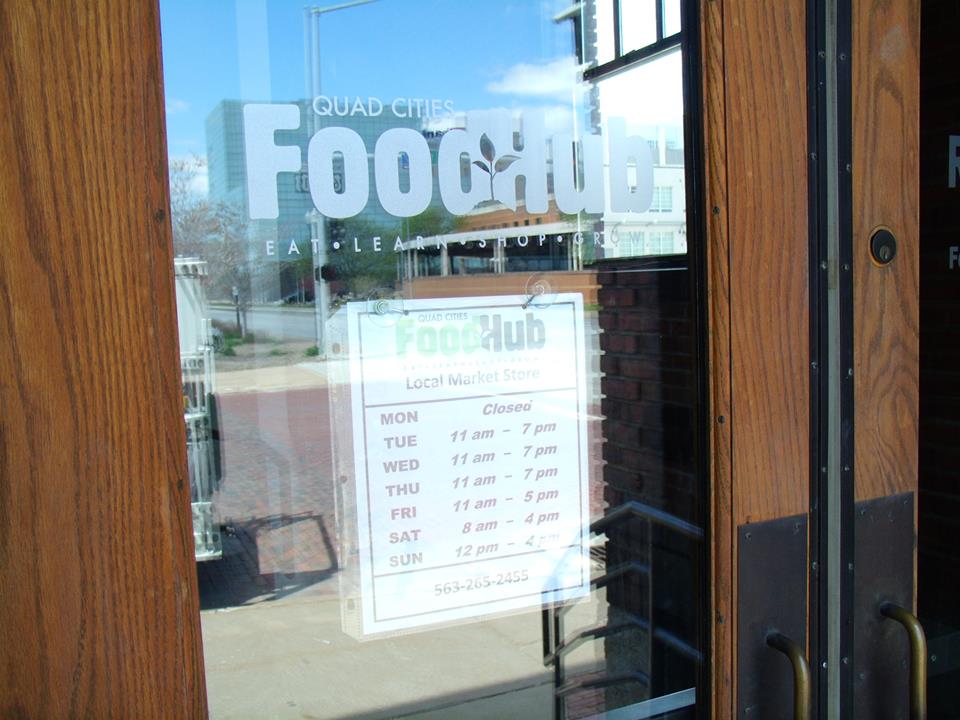
Another beautiful thing about consigning with the Food Hub is that I have the opportunity to provide educational experience and do meet and greets with MissNissCraftworks. This is something I haven't been able to do in the past and am excited for the opportunity.
So, here's to new adventures and a positive experience! Head down to the Food Hub anytime to get one of my flower inspired, hand made washcloths or scrubbies for your kitchen or bathroom! They are a wonderful addition to any home and are a treat to use. 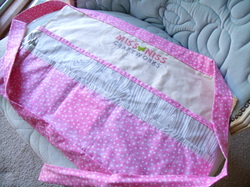 Good Morning, all! At least, I hope your morning is going well. Mine is fairly quiet and a lovely change from this last weekends bustle at the craft show. The rhubarb festival didn't go quite as planned, but it was a learning experience. I met a few nice people and got to try rhubarb soda, so not all was lost. But, enough about that! What I really wanted to share with you today is the apron I sewed myself for craft shows. I was getting a little tired of not having my money very accessible, not having pens and paper on person, and simply not being hands free! I looked for a few examples of 'vendor aprons' and 'utility aprons' online and came up with my own little pattern that fit my style and would show off my sewing and embroidery skills. The very first thing I did was to embroider my logo onto fabric. I chose a natural color muslin to do it. I like the sandy look and the fabric has lose enough fibers to create a small cross hatch which helped me keep things even. Here's the finished product below 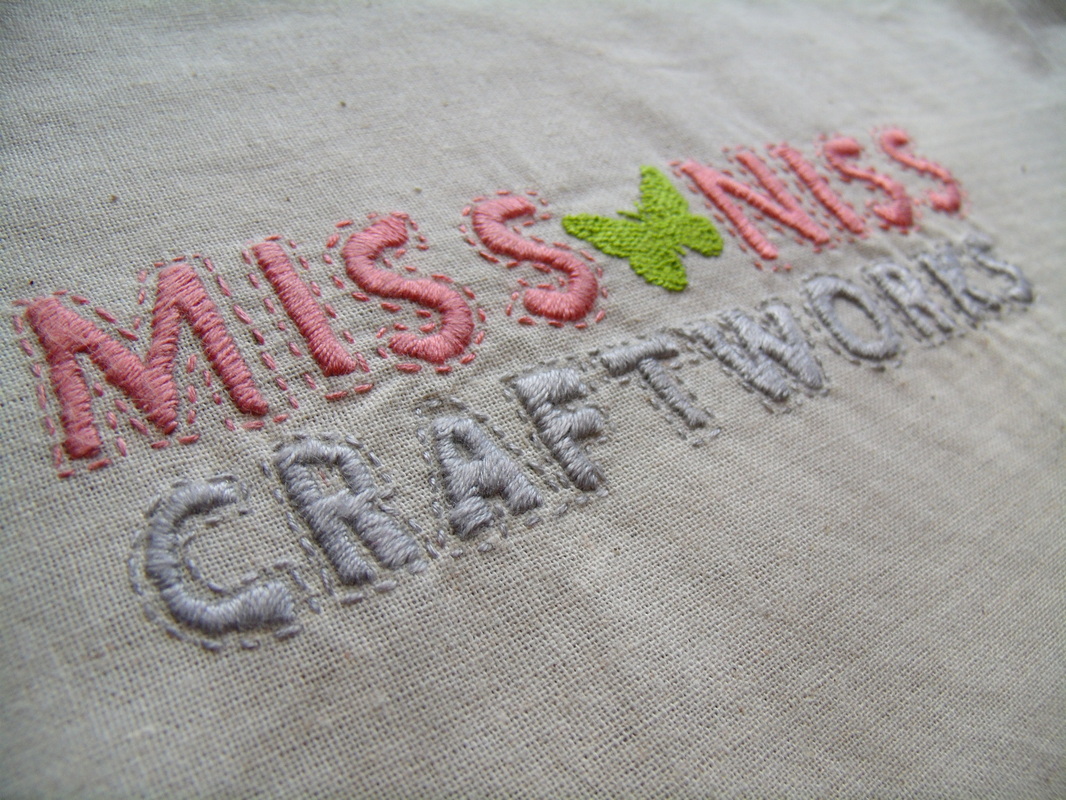
I actually had another vendor comment on my apron the day of the show. She liked it and I let her know I did it all myself with the embroidery done by hand. She was floored. I was floored that she was floored! She was surprised that it was done by hand and showed her husband, too, saying "You know that $1300 machine I just bought for embroider? Well, she did it herself by hand!" I admit, I'm happy with the way it turned out. It's not absolutely perfect, but it's well done. The next thing I did was picked out a couple other fabrics to compliment my logo and reflect my personality. I chose a cute pink polka dot pattern fabric that was as close to my color palette as possible and a neat gray wood pattern fabric to connect with my love of nature. 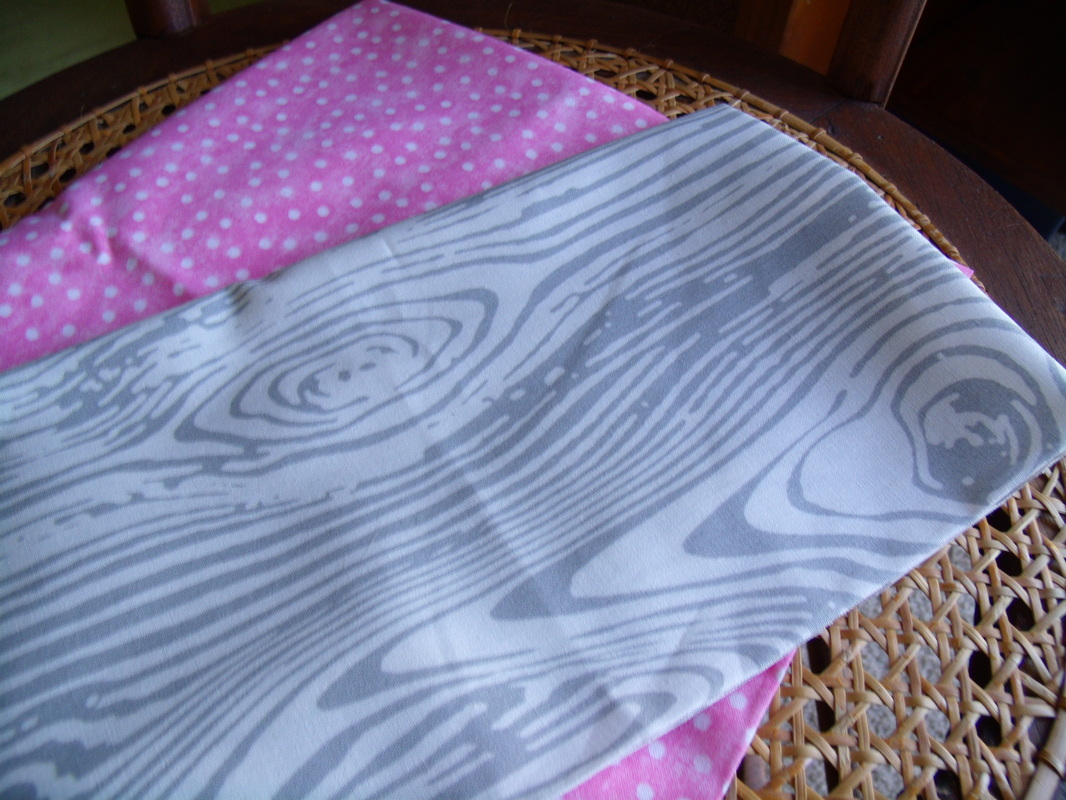
For the rest, I knew I wanted a big pocket in the back and several little ones in the front. The large one would allow me to store larger items and the smaller pockets could hold pens, paper, and business cards. I backed the whole apron with the gray and used the pink to create a long ribbon tie. 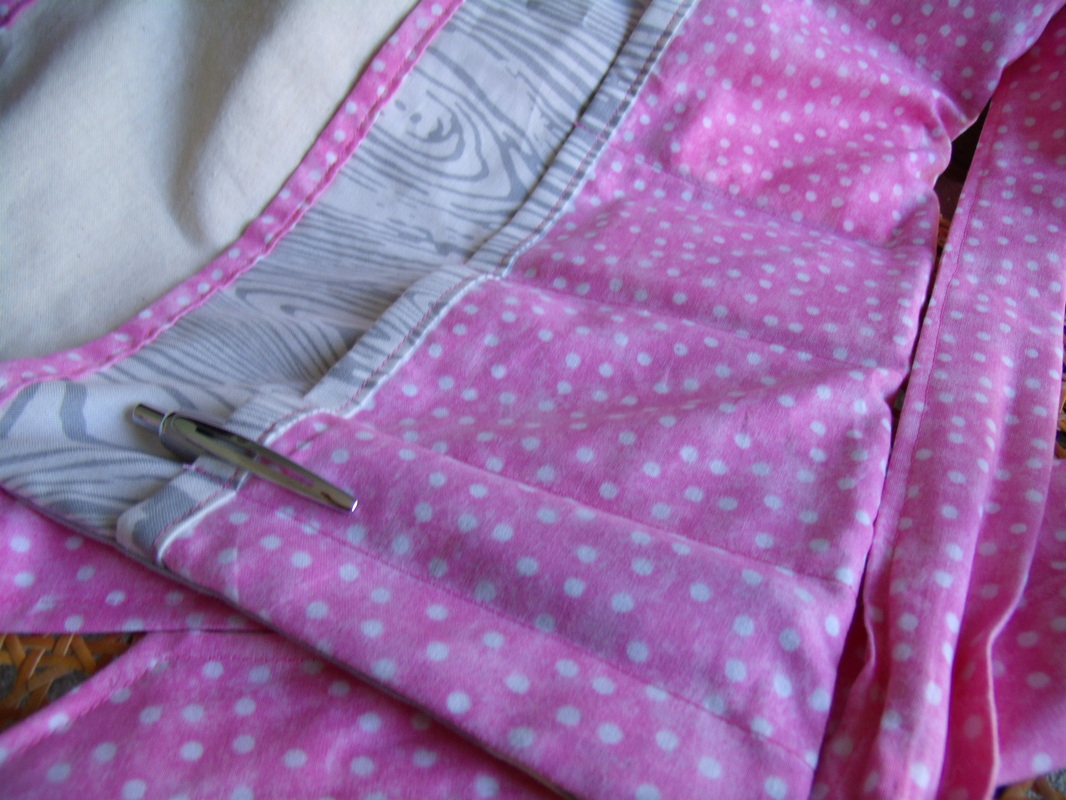
I found that this apron style to be very useful in addition to be attractive to wear. If you're someone who sells at craft shows or even farmers' markets you definitely need one of these! I am contemplating sewing more aprons in the future, so keep your eye out if you'd like one from me someday! :)
|
Author
My name is Annissa, owner of MissNissDesigns. I am a knitter, crocheter, sewer, and all around crafty lady. Archives
April 2023
|