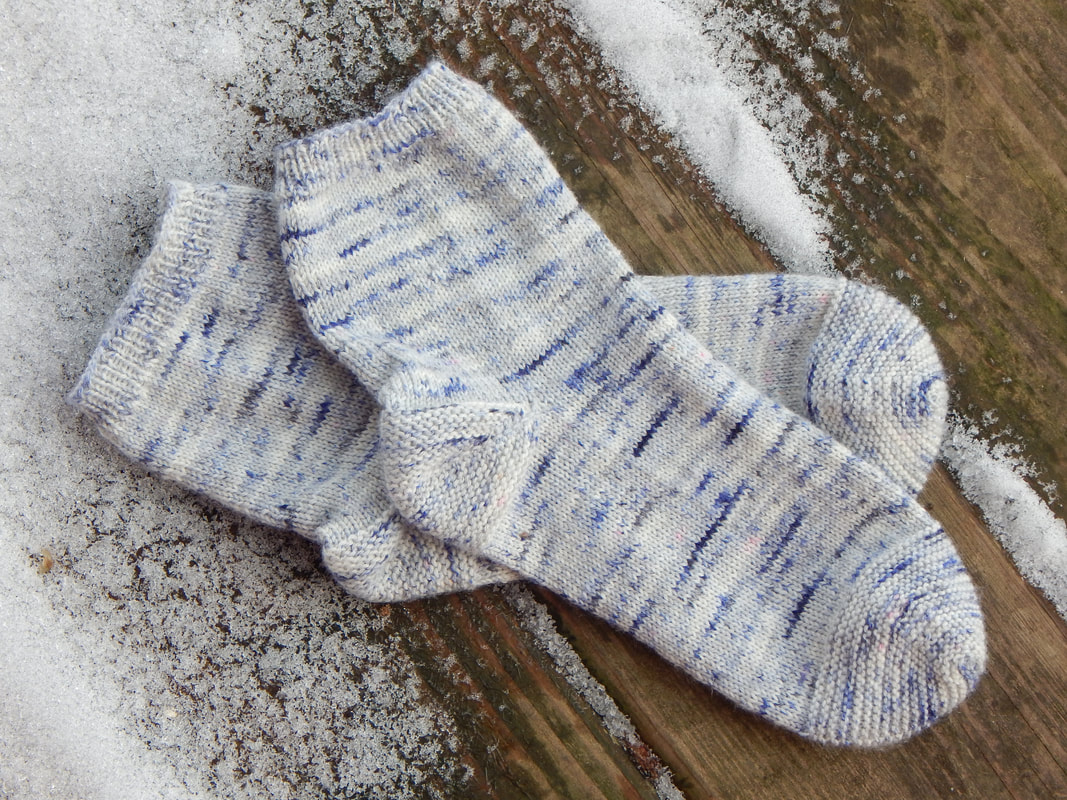
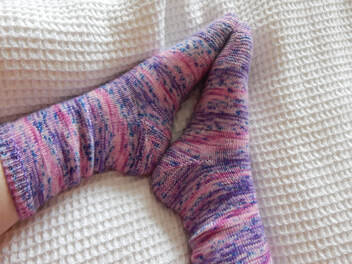
 As stated in my 2022 goals, I wanted to start writing and publishing patterns again this year. So, here is my first pattern! Meet the Vanilla Ridge Socks Vanilla socks with a twist! I created the Vanilla Ridge Sock Pattern to be a mindless knit with a bit of textural interest. I love the squishy feel of the garter stitch. To me, garter stitch feels warm and comforting. So, I added this stitch to the part of the foot I feel needs the most love, Heels and Toes! I first published these socks in February, but am finally debuting them here. <3 These are seriously some of my favorite socks to wear. They are so cozy and squishy. There are four sizes and three cuff lengths included in the pattern You can find the patterns both in my Etsy and Ravelry stores. I hope you grab it and knit yourself up one or three pairs like I did! ;)
0 Comments
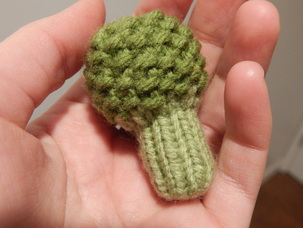 Did you like broccoli as a kid? I didn't unless it was in a cheese soup. It wasn't until after high school that I really loved to eat this nutrient dense vegetable. We also grow it every year in our garden. We've had most success with a variety called De Cicco. It's a nice flavored, early variety that continues to put on side shoots after the main head is cut. Superb! As for my creation I decided to knit a broccoli florette. I could have easily crocheted one, but so far in this challenge I haven't done ANY knitting. The pattern uses only two stitches - stockinette and seed stitch. You can use your finished broccoli however you like, but I gave it to my cats as a toy! They absolutely love it. 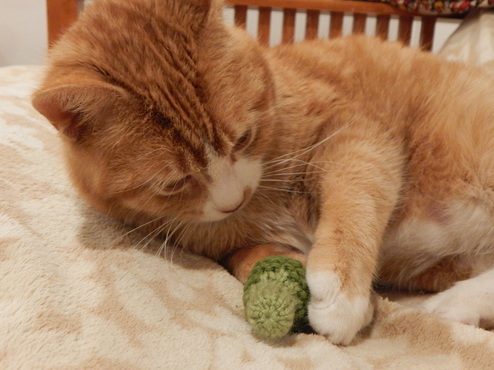 Knit Broccoli Pattern Materials Stitches
Worsted weight yarn Cast On light green and dark green Knit (K) Size 5 DPN Purl (P) Scissors Knit two together (K2tog) Tapestry Needle Purl two together (P2tog) Poly-fiber Fill Pattern Cast on 9 stitches onto your DPN 1.-13. Knit around (9) 14. Increase in each stitch around (18) 15. *K1 with light green, K1 with dark green* repeat around -- Break light green and continue with dark green only -- 16. *K1, P1* around 17. *P1, K1* around 18.-25. Repeat rows 16 and 17 26. *K2tog, P2tog* repeat 4 more times (9) 27. P2tog, K2tog, P2tog, K2tog, P1 (5) F/O and cinch in the top opening. Stuff broccoli with fiber fill using the stick that usually comes with the bag. This can take a little patience. Cinch in bottom part of broccoli and you're done! 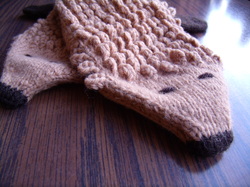 Happy New Year everyone! It may seem a bit late that I'm wishing you this, but I the year IS still new, so I can still wish it. I've had a busy year so far. Some of it great and some of downright sad. The great part of it is that I've finally got a pretty good vision for Miss Niss Craftworks. This is my new year's resolution. To better the business and get it on the right track. I have already changed the logo to be a bit more fitting for the business. Text is be a stitched looking font, which I found appropriate. The butterfly will still be part of the logo, since I'm quite attached to it and it will go with the product concept I'm working on. You see I want to offer products that are more 'me.' Not necessarily in style (but will be on some level), but in spirit. I've been trying way too hard (in my mind at least) to be something I'm not. I tried things that were popular, but they don't really sell and they weren't entirely me either. There are too many of them as there is! How can I compete with that? Plus, I didn't completely enjoy making things so similar to others. Anyone who knows me knows I LOVE gardening and all things related to nature. So, I am planning to create products that have the spirit of the beautiful outdoors in mind. I already have my cute little birds and flower headbands other ideas won't be too hard. One of the items I'm considering making for sale are the hedgehog mittens you see in the photos. These cute little critters I've notice are a bit popular. People want to buy the actual animal as a pet or occasionally I'll see one as ornaments or whatever. Actually, I got the idea from my brother. My brother, who these gloves belong to, loves them as well! I thought the pattern turned out pretty nice as well. I love the look, though will try maybe a brown and cream for future mittens. I also need to figure out the thumb hole a bit better. All in all, I do believe hedgehog mittens would be a great addition to my knew product concept! 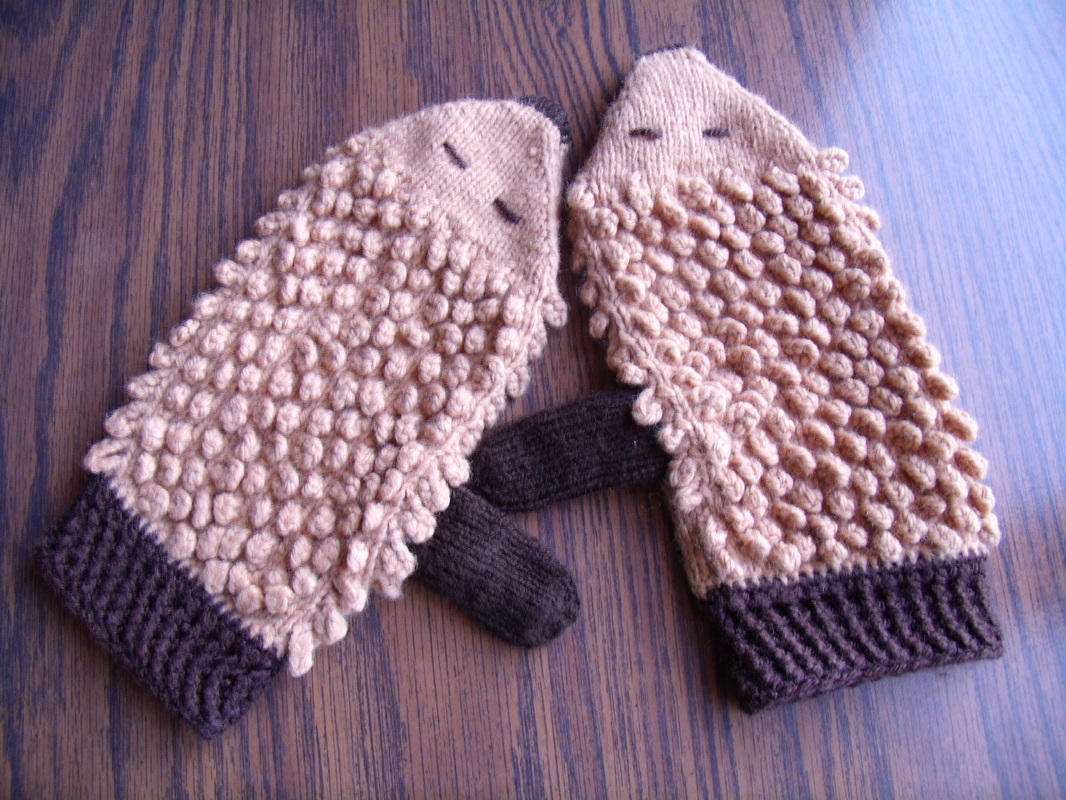
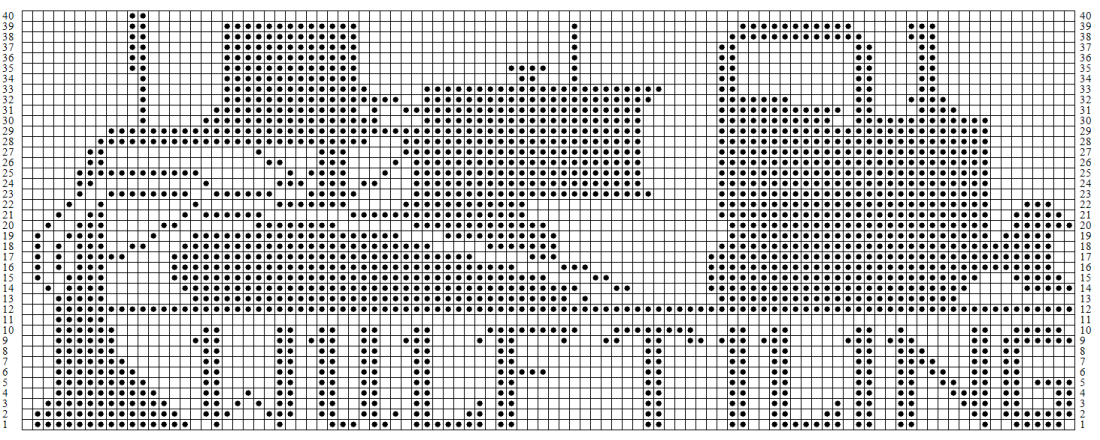
I have had quite a few special orders lately. All of which were hats. I'm getting pretty good at hats. :p A majority of them deal with unique designs. So, an example of one is a local high school sports team. You may be wondering how I design said hats. Well, it's actually quite simple. I use a program called Knit Design Studio by Savannah Winds Studio. The program is free, so if you're a knitter you can definitely download it and use it yourself! It does have a couple set backs, but this is not the post for that. The first hats I did I had to do free style. The purchaser gave me artistic reign over the design, so I had a bit of fun. It was for a local sports team that didn't have a whole lot of visuals online for me to follow. The mascot design on the school's homepage was too complex for a child's hat, too. I ran with it. Here is one of the designs I used. 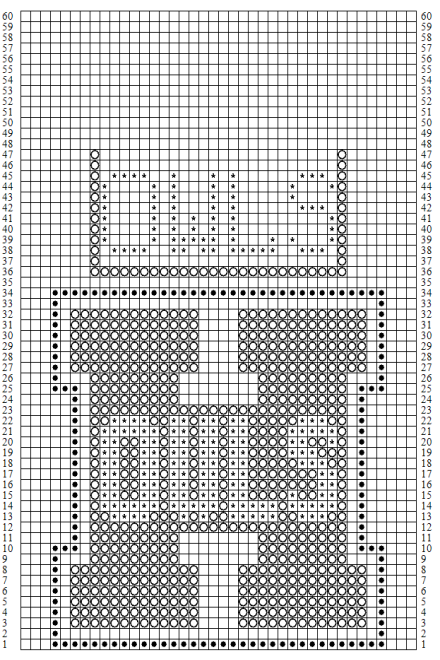
As you can see, I have an alternative lettering for 'OWLS' above the big 'H.' The 'W' in the original word wasn't quite right, so I needed to fix it. The draw back is that the program doesn't let you just erase squares willy nilly. You have to go and undo in order, or at least that's all I've found I can do. If anyone reading this is a bit more knowledgeable about the program and can tell me otherwise, please do! Another design I've had the privileged of doing is for a small business. In this case they already had a business design, so I did my best to follow it. I think it turned out pretty well! The top is the original and the bottom is my design using the Knit Design studio. 
I hope to be able to share more of my designs with you as I do them on my own or receive special orders. It's quite a delight to see something I've made on 'paper' be created into something knit!
 I had a wonderful Easter with family last weekend. We travel to my Great Aunt's house for holidays now. The older generations in my family are slowly disappearing and I want to spend as much time I can with the ones that are still with us.
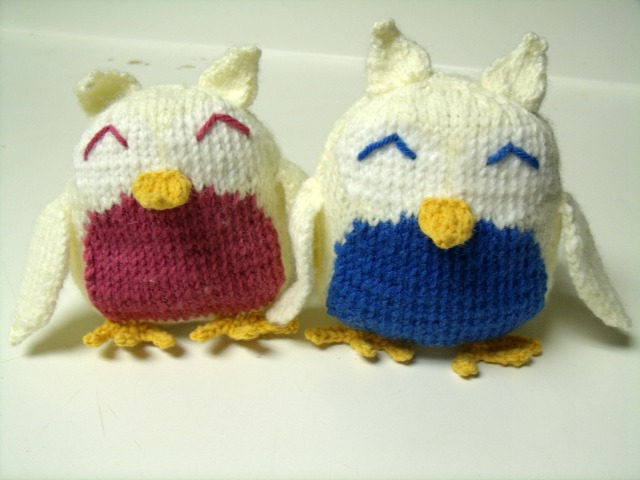
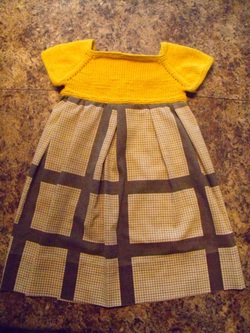
Well, the Easter season and spring weather inspired me to step out of my comfort zone. My result was this cute toddler dress. The top is completely knit with buttons on the back to close it up and add a little bit of interest. The skirt is actually an old pillow case. It made it pretty easy to put together. I just used the already hemmed edge of the pillow case for the bottom and gathered at the top. I attached the two together by sewing the skirt onto the cast off edge of the dress with the same color yarn that I used for the top. When researching on how to do this I think some people used cotton thread, but I found that to be too flimsy and didn't hold very well. I'll have this dress in the shop soon. I am planning to attach some yoyos for decor and add a hair piece as well to match. 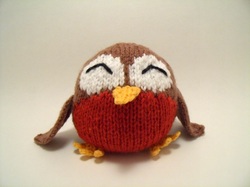 Spring is here, but it doesn't quite feel like it. Our snow is gone, but it's cold. Doesn't seem to bother the tulips, daffodils, and crocus though! I'm excited for their cheery blooms in the coming weeks. I mentioned last week I was working on some birds for the shop. Taking pictures took a bit longer than I anticipated, so I'm sorry for the late update. Above you'll see all the spring hatchlings that have arrived in the shop. So far, there's a bluebird, robin, goldfinch, and well, just a cute bird! The first three in the picture below are the ones I've recently made and the last one is just a sweet bird I originally made while playing with my bird pattern. I'm sure you can agree that they're all super cute! I absolutely adore them and if I could I'd keep them all for myself. haha! But I want you to have them, so you can adopt one of these birdies for yourself in the shop -- and be reminded of spring and summer. 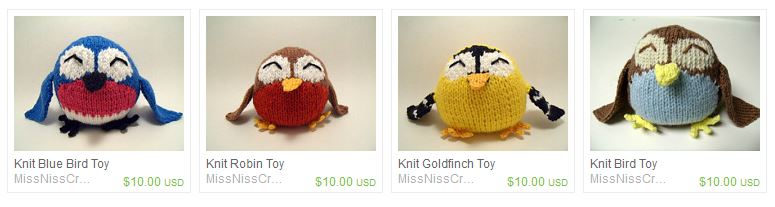  You're right, the picture on the left isn't anything knit, crochet, sewn, or crafted in anyway. It's an inspiration for the bird toys that I'm fervently making thins week. I've tried the cardinal already, but it doesn't look quite right in toy form yet. ... I'm a little too embarrassed to share it either. However, there are quite a few other birds from my ecosystem that I will be making. So far I've whipped up a robin and blue bird. They're super cute and next week they should be in the shop! Maybe I'll share a sneak peak over the weekend. Today I've set my sights on a sweet little goldfinch. The design is going to take a bit of work since these beautiful birds have a significant amount of interlacing color. I'm really excited to present these toys for sale soon! The owls have been a hit in the shop. I have two styles: a snowy owl with a colored belly and a barn owl.
If you didn't know, I also have one sweet little birdie in the shop as well! Not a specific kind, but ya know just a cutie little bird toy. Check that one out in the Etsy shop for yourself. :)
 No, I'm not talking about a pudgy little two year old going through his or her 'terrible twos.' We aren't quite ready for children at this point in life. My hubby and I would love to enjoy our time together a bit longer before a little one of our own enters our lives. I will admit, though, our kids will have the cutest clothing items and toys I can knit, crochet, and sew! Be jealous when that day comes, haha.
My 'twos' troubles come from my obsession with items that I need to make a matching pair. I absolutely love hand warmers and shoes. Only once I get one done, I really don't want to make the other! I can't tell you how many single hand warmers I have lying around my knitting cupboard! Recently I've started designing some baby shoes for spring and summer. I figure it's not going to be cold much longer and some people may not what to purchase some cozy warm booties once the weather starts to warm up. But what do I know, I don't have children, right? :p With the designing and creating of a prototype I usually don't want to make the pair. (That is, if it turns out right.) I really enjoy the creative process and honing my skills while doing so. I seem to spend all my energy with my ideas that the time I'm ready to actually get down to work I'm spent. However, I do believe there are some things we can all learn from my follies. -Be creative, but not all at once. I tend to seize the moment and utilize all my energy in creating at one time. By doing so, I have a lack of enthusiasm to continue with projects and actual work. -Finish what you've started I suppose this is the whole premise of the article. I don't finish what I start every single time. It's really hard staying focused on one project for a long time! It's mostly why I have purposely not done sweaters, vests, and large afghans on a regular basis or at all in some cases. I personally need to stay focused and finish what I am working on before I allow my creative mind to get distracted by something else. My husband complains a lot about my flitting spirit and mind... maybe working towards better focus will make him happier too! -Take a break I need to learn to take a break from items that have pairs. I think it will help me put in perspective the types of projects I really do enjoy and offer me a variety. Things I know, but of course look better in hindsight. These three bullet points seem to just about put things right. For me, I believe they're good points to remember. Putting them in this blog I hope will prompt me to take my own advice more often! Do you have any advice for my dilemma or your own faults in your crafting world? I'd love to hear you share them in the comments below.  Welcome to March everyone! I can't believe how quickly the first two months of the year have gone. Maybe it means that I'm enjoying life. About a month ago I started volunteering to help teach a middle school steel drum group in the school district near by. They didn't ask me to help, in fact the instructor sort of implied that I wasn't really needed, but I wanted to be involved. I don't think I ever mentioned this on the blog, but in high school I got the grand opportunity to be part of an amazing steel drum group, Pandemonium!. I was part of the second generation added to the ensemble. We had an blast, getting to travel the country to perform and teach. The group is now disbanded due to reasons I that I don't feel like indulging you in. The point is that many of us still long to play in a steel band group, preferable together, but cannot due to not owning an instrument ourselves and the fact that many of us live hundreds to thousands of miles away. Mhm. It's a very sad picture. I didn't let it go, though! I searched our community for some group to be involved with and found this sweet little middle school steel band. Ahhh, it makes my Monday mornings the favorite time of my week! I feel like I can conquer anything after I've been with those kids ... and those drums! :D Well, now that January and February have moved along nicely. I thought a great way to kick off the March would be to have a round-up of some fantastic shamrock/shamrock inspired knits and crochets. 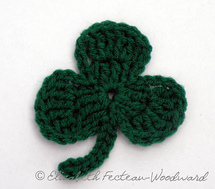 The first shamrock is from Elizabeth Woodward of Say-Very Sweet Things It's a simple crochet shamrock that I think would work great as an applique for just about anything you can think of! 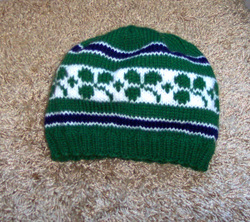 From All Kinds of Knitting is a stunning knit 'Ireland Rugby Hat' I absolutely love this hat. It's made very well and the graphics come out lovely. You can get the pattern by downloading at the bottom of the post. 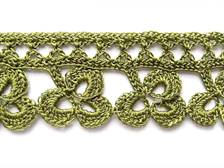 The website MyPicot has a wonderful crochet shamrock edging. I think it's sweet and would be great for a St. Patrick's Day shawl or blanket edge. It'd be a neat trim for cuffs as well. The pattern shows up under page 9 and from there you click to download it. 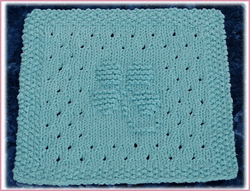 Rachel van Schie of Knits by Rachel has this amazing little dish towel! So, if you're like me and like to have themed items during certain holidays (I know it's a bit absurd, but I do it!) this is a perfect dish towel to knit. 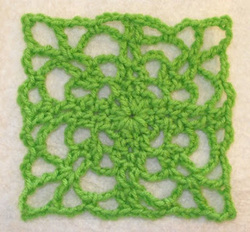 Julia Tellier of JTellier: An Artists View has a very neat 'lacey shamrock granny square' design available. It is a bit lacier than other granny squares. However, the way the shamrock develops out of the pattern, as well as smaller ones, is just phenomenal. 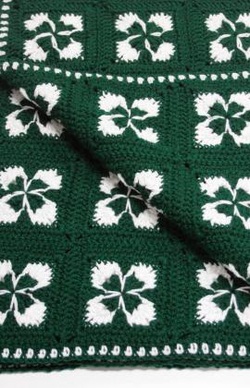 Red Heart has this AWESOME shamrock granny square afghan pattern available on their website. I've seen a few other shamrock afghans, but I really enjoy how the four leaf clover shows in this particular pattern. 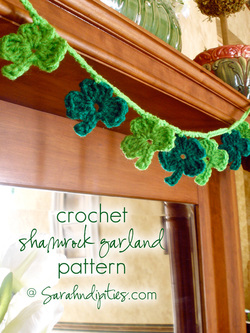 Sarahndipities is offering this awesome shamrock garland pattern! So, if you need some decor for the season, go ahead and follow this pattern for some sweet garland. I just might! 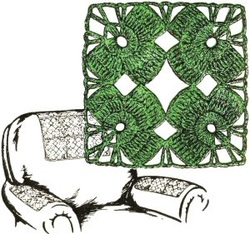 Here's another nice shamrock granny square pattern, but this one comes from Karen's Variety! This pattern displays the shamrocks a little more blatantly than the previous one, in case you wanted the shamrocks to be more obvious. This picture makes me giggle a bit. I don't think I've actually seen crocheted doilies on armchairs in person, but I know they're out there! Nevertheless, you can always use the pattern to make other things. 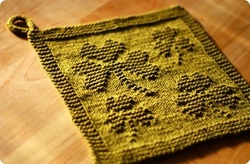 Kris Knits has two shamrock dishcloth patterns! Yeah, only one is showing right now. The other's a large shamrock inside a circle. Click on the link to see the other! 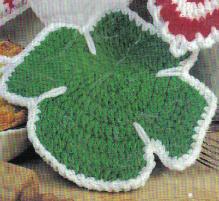 Finally, I give you a shamrock potholder from MomsLoveCrochet.
I like this one because it's in the actual shape of a shamrock rather than a square with shamrocks inside. There you have it! 10 very awesome shamrock designs to keep you busy this March. Enjoy and feel free to share any other designs you personally like or have designed in the comments below. *all pictures are accredited to their designated websites* 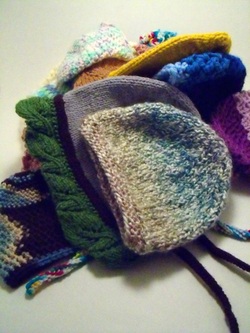 One type of items that I have previously been scared of making are hats. At first, all I knew how to do was knit, and I didn't have a set of circular needles or double pointed needles. I didn't know how to crochet either! Working in a round is so easy now that I know how. So, I thought I couldn't make hats or anything round, really without a seam. Because of that fear, I've been on a quest to find a variety of hats that use a variety of methods. I'll admit, my first hats were pretty sketchy. The fit, they worked fine, but they didn't look awesome in my mind. I knew what I wanted to see, but the outcome definitely wasn't it! I guess it all goes back to Orville's checklist from 'The Rescuers,' "If at first you don't succeed, try try again." While he's not the first one to have been documented to give that 'advice' this context rings better with me! :) My husband and I love this movie, a better time in cartoon movie history in my opinion. But I digress. I tried and tried and tried. Eventually, I found a pattern that I absolutely love and well loves me back! I'm sure I'll still have duds in the future, but I'm very happy with the results I received from this pattern. The pattern is for a knit baby hat which does have a seam in the back, but doesn't detract from the beauty of the hat. I plan to develop some with embellishments and neat color combos, as well as adult sizes. For now, here's the baby/toddler ones I've already made up! 
Pretty gorgeous right? It looks so warm, soft, and comforting for baby's head. Awww. Just think about how awesome adult sizes will be! My creativity juices are almost eeping out of my head right now. Haha, gross? Ah, oh well. Below is sort of a 'timeline' of my hat 'development.' They all are drastically different as I honed my hat making skills and educated myself more in how to knit and crochet. I think I actually have more than the ones shown, but can't seem to find where I put them since they were just prototypes and I didn't store them with my shop items. ...I dream of the day I get to build my own office! 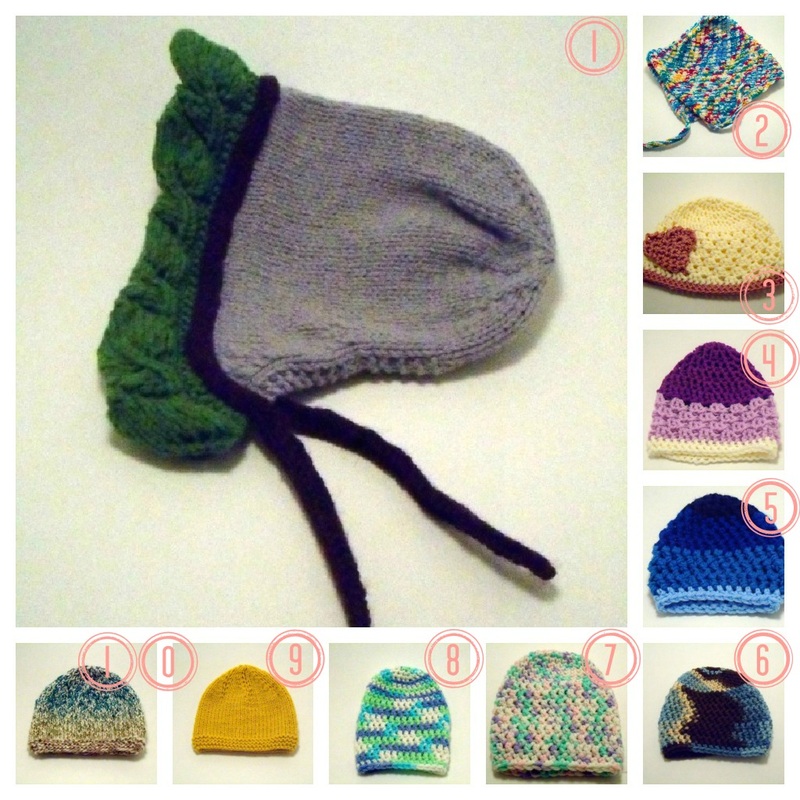
|
Author
My name is Annissa, owner of MissNissDesigns. I am a knitter, crocheter, sewer, and all around crafty lady. Archives
April 2023

|